ODA
User manual
WARNING: ODA is a supplemental device. Do not use ODA as the sole source of information displayed.
WARNING: This device is intended only for thoroughly trained persons with a valid certification for diving with a Liberty rebreather. Improper use can cause injury or death.
Content
1. ODA Technical specifications
3. How to connect ODA and put it in to operation
6. Rear LED and ambient light sensor
7. ODA behaviour during the Pre-dive check sequence
8. How to read the data on the display
10.2 Presence of strong magnetic fields
1. ODA Technical specifications
Max depth: 300 m (984 ft)
Diameter: 39,40 mm (1,55 in)
Length: 66,50 mm (2,62 in)
Weight without holder: 150 g (0,33 lb) connector and cable included
Buoyancy: neutral
Connection: HUD/BD connector
Connectivity: Divesoft Liberty 2021 edition
1.1 Material
Body: Delrin
Optics: Sapphire glass with anti-reflex coating
Display resolution: 428 × 240 pixels
Focus: Fully adjustable
Color: black
Package content: Semi hard case, ODA, lens cover, adjustable mount.
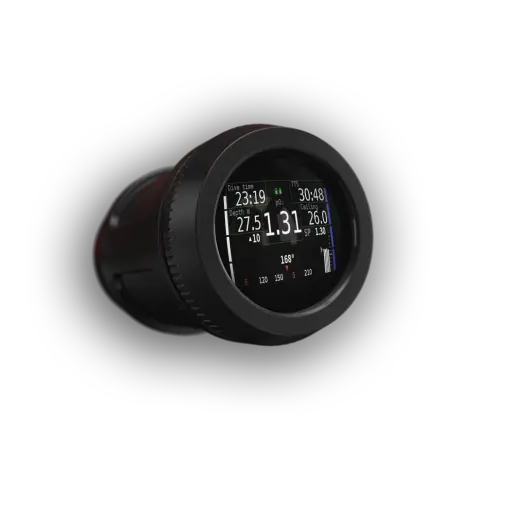
2. What is the ODA
The ODA – Optical Display Adapter is a visual display device that provides diver with important information about the dive in the diver’s field of view. The purpose of this device is for the diver to always have dive information available, even when the diver cannot view the information from the handsets. The ODA maintains the diver’s constant awareness of dive conditions and notifies the diver of the event of dangerous values impacting diver safety. Displayed data: ppO2 , depth, time, no-decompression time / decompression ceiling, TTS, setpoint, oxygen sensor deviation, oxygen pressure, and diluent pressure. ODA can only be used with the Divesoft Liberty platform. It cannot be connected to other rebreathers or used as a standalone computer.
IMPORTANT: ODA is only compatible with Liberty 2021 Edition and FW 2.16.2 and higher. Make sure you have the correct FW installed in both the CU and the handset. (This can be found at the start of the device or in the menu / Setup / System check)
3. How to connect ODA and put it in to operation
Attention: Firmware version 2.16.2 or higher is required for proper ODA functionality
The ODA is equipped with a connector identical to the HUD or Buddy Display. Theoretically, it is possible to connect ODA to the left and right CU, but the cable routing determines a more advantageous connection to the right CU and the cable routing along the right corrugated hose.
Before installing the ODA connector to the Liberty head, make sure that there is an O-ring seal on the connector and that it is well lubricated. Secure the connector in the head with the two enclosed screws using a 3 mm Allen key.
Wrap the ODA cable around the corrugated hose so that it does not form excess loops and is not too short that head movements are restricted.
IMPORTANT: ODA needs to be enabled in Preferences in order to power on. On the handset in the main menu, select Setup / Preferences / Indication. For Left and Right, Buddy D., HUD, ODA, and None are selected. Depending on the actual ODA location (left CU, Right CU), select the ODA value for the item. Without this setting, ODA does not work!
Recommendation: If you use only one handset in conjunction with ODA, have ODA on the opposite CU than the handset. This allows you to back up the displayed information in the event of a failure of one of the CUs or batteries.
4. Placement
Slide the included ODA holder into the rail on the DSV or BOV of your Liberty. ODA can be installed on both the left and right eye, which is a matter of personal preference.
Everyone has their dominant eye, which they perceive more naturally. The dominant eye can be independent of whether you are right-handed or left-handed. If you do not know which is your dominant eye, try which position of ODA suits you better and you feel more natural and comfortable when watching it.
If you need to replace the ODA location side, you must unscrew the top hinge securing the ODA and screw it to the opposite side of the holder’s arm.
If necessary, you can flip the ODA display. Go to Setup / Preferences / Indication / HUD screen right/ left.
Adjust the position of the ODA so that it is in your field of view and at the same time does not excessively obstruct the view and does not collide with your diving mask. Pay close attention to the setting of the ODA angle to your eye. The angle has a major effect on the display of the entire ODA display.
The distance of the eyepiece from the eye should be approximately 4 cm (about 1 1/2 inch).
WARNING: Wiring the Handset and ODA on one side of the Liberty electronics significantly increases the battery consumption on the associated Liberty half. If you are using both ODA and a handset on the same side, we recommend turning the handset off or setting up a screensaver. You can always wake the handset up in case of ODA failure.
5. Focus
Rotate the eyepiece adjustment ring so that in the set ODA position, you can see the display sharply while seeing the surroundings without having to close the opposite eye or refocus between the display and the surroundings. The screen image should appear as if projected into the environment. If you are unable to focus on the screen, change the distance of the eyepiece from the eye and continue focusing.
If the focusing mechanism is too stiff, it's for design reasons, and it's not a bad thing. Use the included wrench to focus the eyepiece.
Although finding the optimal position so that you do not have to refocus may seem difficult at first, you will learn how to use ODA with your preferences in no time.
6. Rear LED and ambient light sensor
At the back of the ODA there is a LED serving as a buddy display, which indicates to the diving partner the breathability of the gas in the loop or reports the danger of the diver. The LED illuminates green within the safe range 0.2 bar < ppO2 < 1.6 bar. Outside the breathable range, LED lights up red.
On the back of the ODA there is also an ambient light sensor used to automatically adjust the brightness of the display according to light intensity. It is not an LED, and does not emit any visble light.
7. ODA behaviour during the Pre-dive check sequence
During the pre-dive check procedure, the base screen is displayed, and during the HUD check you will be prompted to check the ODA screen. When checking the Buddy display, the corresponding colour of the rear LED lights up according to the colour displayed on the display. However, the brightness of the LED remains the same and does not change as on the handset or buddy display.
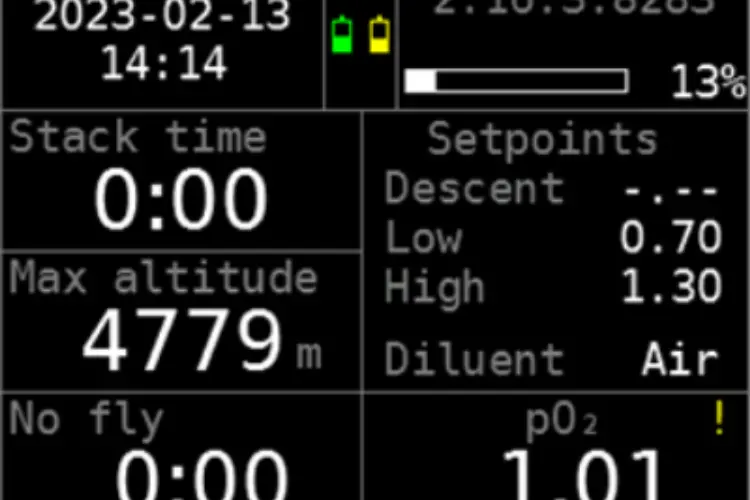
8. How to read the data on the display
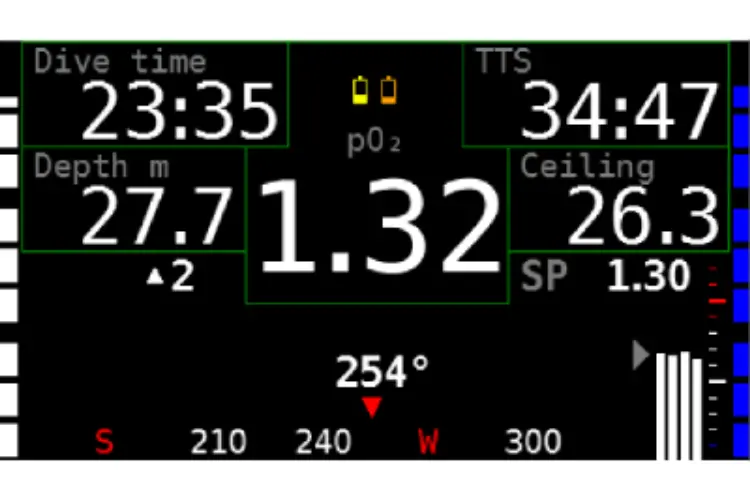
Dive time – Cumulative dive time from the beginning of the descent. Time starts when the diver descends to a depth of 1.5 m
Depth (m or ft) – current depth in meters or feet according to the Liberty settings
SP – currently used ppO2 setpoint.
Compass accuracy– if the compass accuracy is low, an exclamation mark will appear next to the heading with a text warning about the low compass accuracy
Battery capacity – graphically displays the battery status of the Liberty. The colour of the battery changes from green through yellow and orange to red.
pO2 – current oxygen partial pressure averaged from all active oxygen sensors.
TTS – Time to surface. Cumulative time required to surface. Includes ascent time and time at decompression stops.
Ceiling – Decompression ceiling indicates the depth that the diver must not exceed when ascending to prevent the excessive formation of bubbles in the body, which could lead to the outbreak of decompression sickness.
Heading – current direction
Compass – compass rose with indication of basic azimuths, world sides and current course.
Graphical representation of sensor deviation– Each individual oxygen sensor is represented by one column of the graph. The value of the sensor corresponds to the height of the graph, which can be read approximately from the scale on the right. One scale division represents 0.2 bar ppO2 , large scale divisions are by 1.0 bar. Hyperoxic values are shown in red, hypoxic values in blue.
Triangle on the left indicates current setpoint value.
The scale is for guidance only.
An important fact for divers is whether the columns are in one
plane, or whether one or more columns deviate from the others and, if so, to what extent they
deviate.
The bars in the plane mean that all sensors show the same value.
Deviating columns means a sensor with a different value than the others. Keep in mind that the deviated sensor may not be defective, but the only correct one. If the sensor deviates, verify that the sensors are measured correctly according to the procedure you learned in the Liberty Diver course.
The discarded sensor is indicated by a grey bar.
Diluent pressure – graphically represented pressure in the diluent tank (white bar graph).
Oxygen pressure – graphically represented pressure in an oxygen tank (blue bargraph).
The bargraph resolution depends on the firmware version, up to 2.16.2 each segment is 50 bar. From firmware 2.16.3 and up the graph is divided to three segments each consisting of N smaller ones think of a rule of thirds. The maximum value is the configured cylinder pressure in menu. N can vary from one to four segments, depending on graph size. Full size one carries currently a two smaller segments.
*Example would be a 230 bar cylinder, so Big segment = 230 / 3 = 76.7 bar.
Small segment would be 76,7 / 2 = 38.4 bar. *
9. Alarms
If necessary, ODA will alert divers by a screen flashing. It is divided according to severity into notifications and alarms.
Notifications – operational notifications, such as setpoint change, end of no-decompression time, etc. signalled by a short white flash. The value to which it applies is highlighted. The notification is accompanied by a pop-up message.
WARNING: in case of incorrect setting of the ODA position relative to the diver’s eye, the notification flashes may be missed. Make sure your ODA position is well set.
Alarms – displayed in case of a dangerous situation such as exceeding the ppO2 limits, exceeding the decompression ceiling, etc. It is displayed by repeated red flashing of the display. At the same time, the value that was exceeded is highlighted. The warning is accompanied by a pop-up message.
WARNING: in case of incorrect setting of the ODA position relative to the diver’s eye, the warning flashes may be missed. Make sure your ODA position is well set.
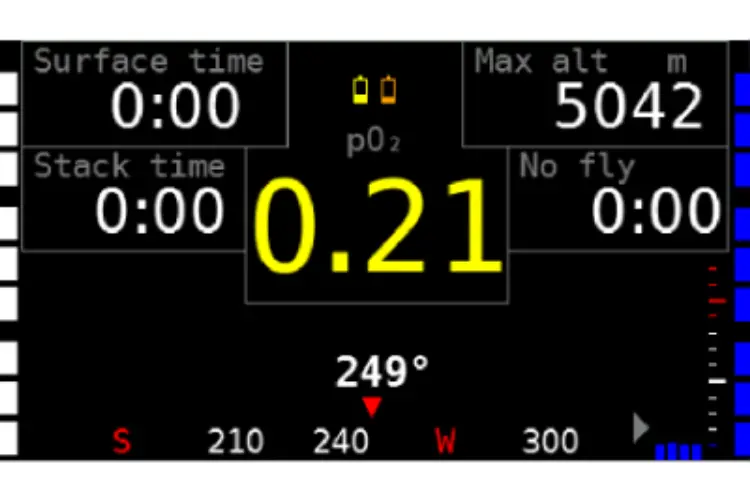
10. Compass and its control
ODA is equipped with a built-in compass in the body of the device. Thus, the diver directly determines the direction in which he is looking.
The compass accuracy is continually evaluated through the dive.
If the compass algorithm detects a limited accuracy, an exclamation mark will pop-up next to the heading. In the surface mode you get additional "Low accuracy" message in the bottom left corner of the screen.
Compass accuracy is determined by the following factors:
- — Compass calibration
- — The presence of strong magnetic fields within range of the compass
- — ODA position relative to the diver’s eye
10.1 Compass calibration
Calibration is being run periodically on the background without the need to enter designated mode. If you susspect low accuracy or a see an exclamation mark next to the heading, make sure the ODA is not near the handset due to it's magnetic button technology. Then on the surface you can follow the calibration steps below. Underwater a helicopter turn or two usually suffice.
- Place the ODA on the left side, leave for 2–5 sec
- Place the ODA on the back, leave for 2–5 sec
- Place the ODA on the right side, leave for 2–5 sec
- Turn ODA several times in the air in the direction of imaginary eights
10.2 Presence of strong magnetic fields
The compass can be greatly affected by the magnetic field of surrounding objects such as wrecks, diving tanks, the high content of iron ore in the rock of the mine’s gallery and other metal, magnetic or electronic objects. The accuracy of the compass may be temporarily affected to a greater or lesser extent within the range of magnetic fields.
10.3 Position of the ODA relative to the diver´s eye
If you use a compass for general orientation, that is, you measure the azimuth you want to swim and you are only interested in the relative orientation to the starting point and the return azimuth, no matter what position you have the ODA mounted on your DSV or BOV. However, it is essential that this position is firmly fixed and does not change during the dive.
If you use a compass to determine the exact bearing, for example to search for a wreck or other object under water, you need to have the compass exactly parallel to the Z axis of your head and the ODA position firmly fixed
10.4 Azimuth fixation
Enter the menu on your handset and select Application / set course.
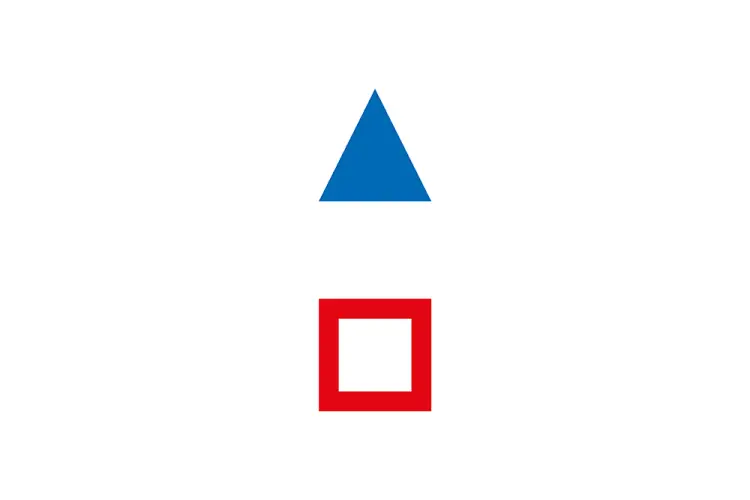
10.5 Survey marks
The measured azimuth is indicated by a blue triangle .
The return azimuth (measured azimuth -180 °) is marked with a red square .
11.0 Liberty FW update process with ODA
We are continuously improving the user experience, both in and out of water. The wireless firmware update process has seen a lot of work, currently improving a speed of the second phase of the update in firmware 2.17.0. Please keep in mind this does not improve the speed of updating to the mentioned firmware 2.17.0. Though once running firmware 2.17.0, any future update will become more fluid.
The firmware update process consists of three phases:
1. Wireless transfer over the Bluetooth
2. Copying of the received data to the other half of the Liberty head
3. Restart with the update itself
4. ODA update
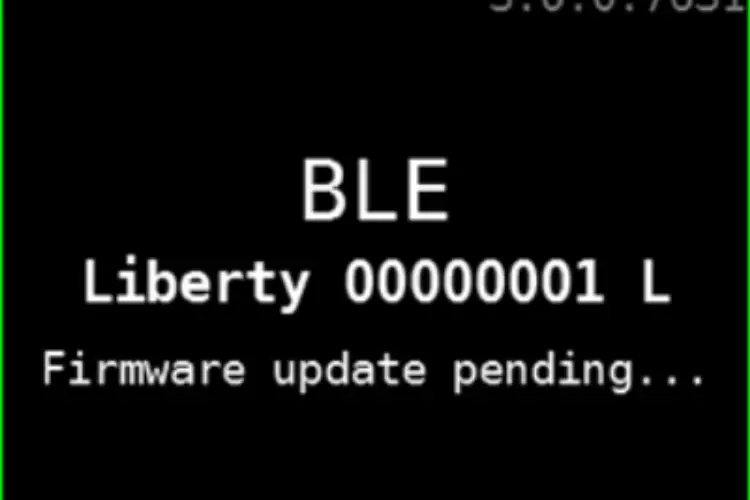
The firmware update process starts with the wireless transfer, which may take up some time (OS dependent). After the transfer finishes, still in the Bluetooth mode, you will see a message "Firmware update pending".
The second phase follows within thirty seconds. If the transfer was succesfull, Liberty will automatically exit the Bluetooth mode and then start the firmware duplication to the other half of the head.
On the older firmwares (before 2.17.0) you will see a "Preparing update..." screen.The improvement from 2.17.0 and up is that whole "Preparing update..." screen is gone, replaced by an indicator on the surface screen upper right corner. And furthermore the whole process is stremalined so it takes now less than 5 minutes, along which you can use the Liberty normally, or just leave it in the surface mode, that is up to you.
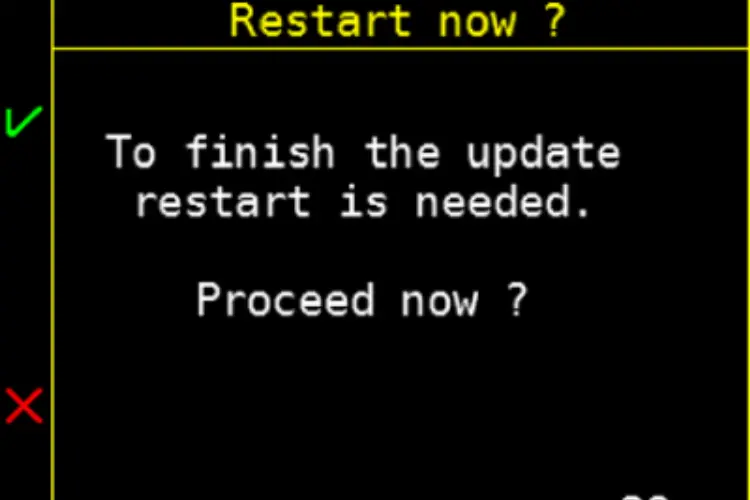
Third phase begins with a queue for user to confirm the restart, after which the Liberty reboots into a bootloader mode and proceeds with the update. If you "deny" the restart, the update will take place the soonest you remove and replace the battery jumpers (eg. when charging).
A fourth phase - optional ODA update takes place on background, about a minute after Liberty startup (or ODA connection to the head). On firmware 2.16.3 and up is inidicated in the upper right corner of the surface screen.
ODA USER MANUAL
- Author
Jakub Šimánek
- Publisher
Divesoft s .r .o . | www .divesoft .com
- Issue
Revision 1 .1 | 28 February 2023
Use of this manual approved by
Lucie Šmejkalová, CEO