User manual
Analyzer DNA
version 2023/11/11
#8460
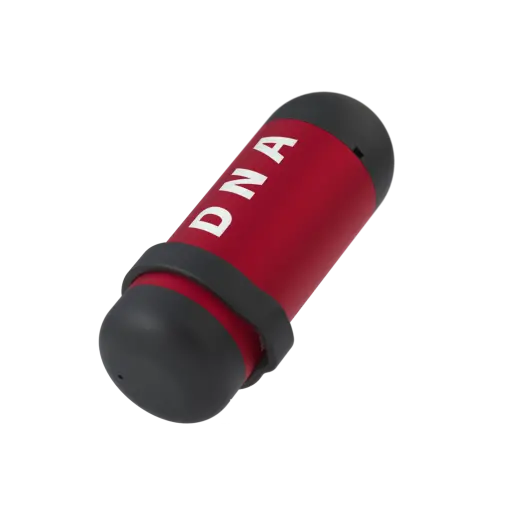
Dear user, thank you for purchasing Divesoft Nitrox Analyzer.
We wish you many safe NITROX dives.
DISCLAIMER
WARNING This analyzer is designed for measuring the content of oxygen in air or NITROX. It cannot be used to analyze mixtures containing other gases than oxygen - nitrogen mixtures. For diving breathing mixtures containing helium use one of DIVESOFT’s trimix analyzers.
ATTENTION: THE DEVICE IS NOT WATERPROOF. DO NOT EXPOSE THE ANALYZER TO WATER.
The physical and chemical principles of the sensors used do not guarantee that the sensors will be selectively sensitive to a specific gas (oxygen, helium); there are a number of gases to which the sensors respond. Therefore, the gas composition shown by the analyzer does not mean by itself that the real composition of the mix is equal to the displayed values. The displayed mix composition is invalid unless the mixing technology ensures that there are no other gases present in the mix except air/nitrogen, pure oxygen and pure helium.
The analyzer is not a certified measuring instrument. The results of measuring are only informative and it is not possible to use such results where a certified measuring instrument is required.
When analyzing mixes in situations where the incorrect composition of the mixes could cause material damage, injury to health or threaten human health or life, for example in the case of breathing mixes for diving, the results of the analysis may not be used as confirmation of the correct mix composition. In these cases, the analyzer can only be used as an aid for increasing the probability that such incorrect mix composition will be detected before its use. The correctness of the mix composition must be established by the technology used to prepare it.
The correct preparation of breathing mixes for diving (NITROX included) requires special knowledge and experience which is possible to gain, for example, through an appropriate course. A failure to apply such knowledge can lead to an incorrect mix, even though the results of the analysis are seemingly correct. Such a situation can also be the result of a failure to take into account the influence of temperature and compressibility, an insufficient blending of the mix and other factors.
Please remember that the analyzer can be broken or damaged and that the oxygen sensor is by its nature subject to ageing and thus its properties deteriorate.
Therefore always verify the measured data in another way, such as by precise preparation of the mix, another analytical method, etc. In addition, the measured value must be subject to critical assessment using a common-sense approach and if it differs from the allowable variation of mixing accuracy, it must be considered invalid.
Content
DISCLAIMER
1. TECHNICAL DATA
2. USE
2.1 Pairing
2.2 Calibration
2.3 Analyzing
3. MAINTENANCE
3.1 Battery Replacement
3.2 Changing the sensor
3.3 Firmware update
3.4 Used sensors and batteries
1. TECHNICAL DATA
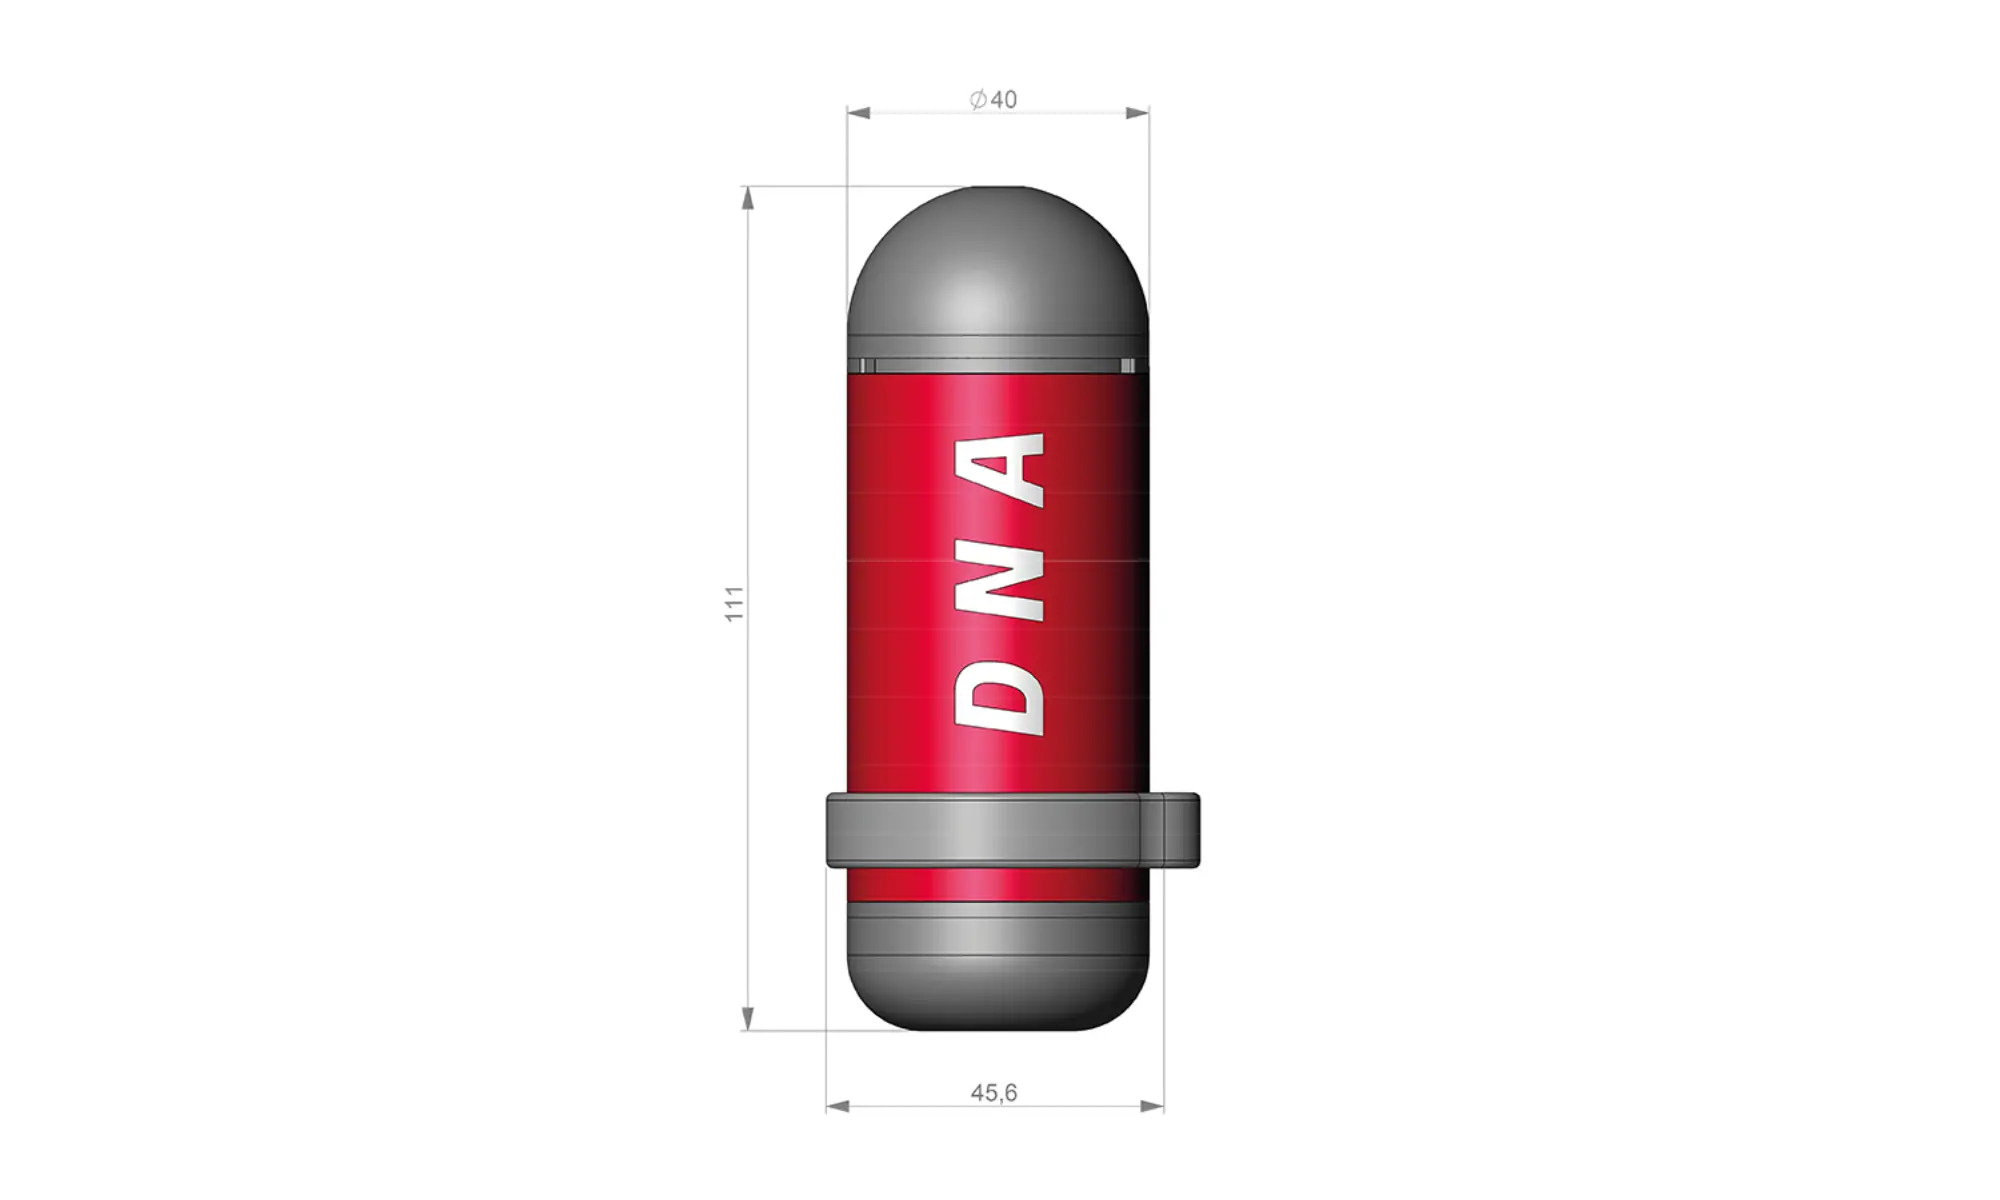
Dimensions: 45,6 × 111 x 40 mm
Weight: 100 g
Weight with DIVESOFT sensor: 126 g
Battery used: CR 2450
Compatible oxygen sensors: R22S, R22D
Measuring range: Total measuring range is up to 300mV, uses two subranges (up to 150mV and up to 300mV). The switching is automatic. The polarity of the sensor must be observed.
Accuracy: Oxygen analysis from 1-100% with accuracy of +/-1%.
2. USE
2.1 Before first use
For battery saving reasons before purchasing the product, the battery is separate from the analyzer. Before first use, install the included battery according to section 3.1 Battery Replacement
2.2 App Download
To use the analyzer, you must download the Divesoft.App. This app is available for both Android and iOs phone operating systems. These versions are available here, or directly in the app stores:


NOTE: Analyzer feature works in app version 1.7.0 or higher.
2.3 Pairing
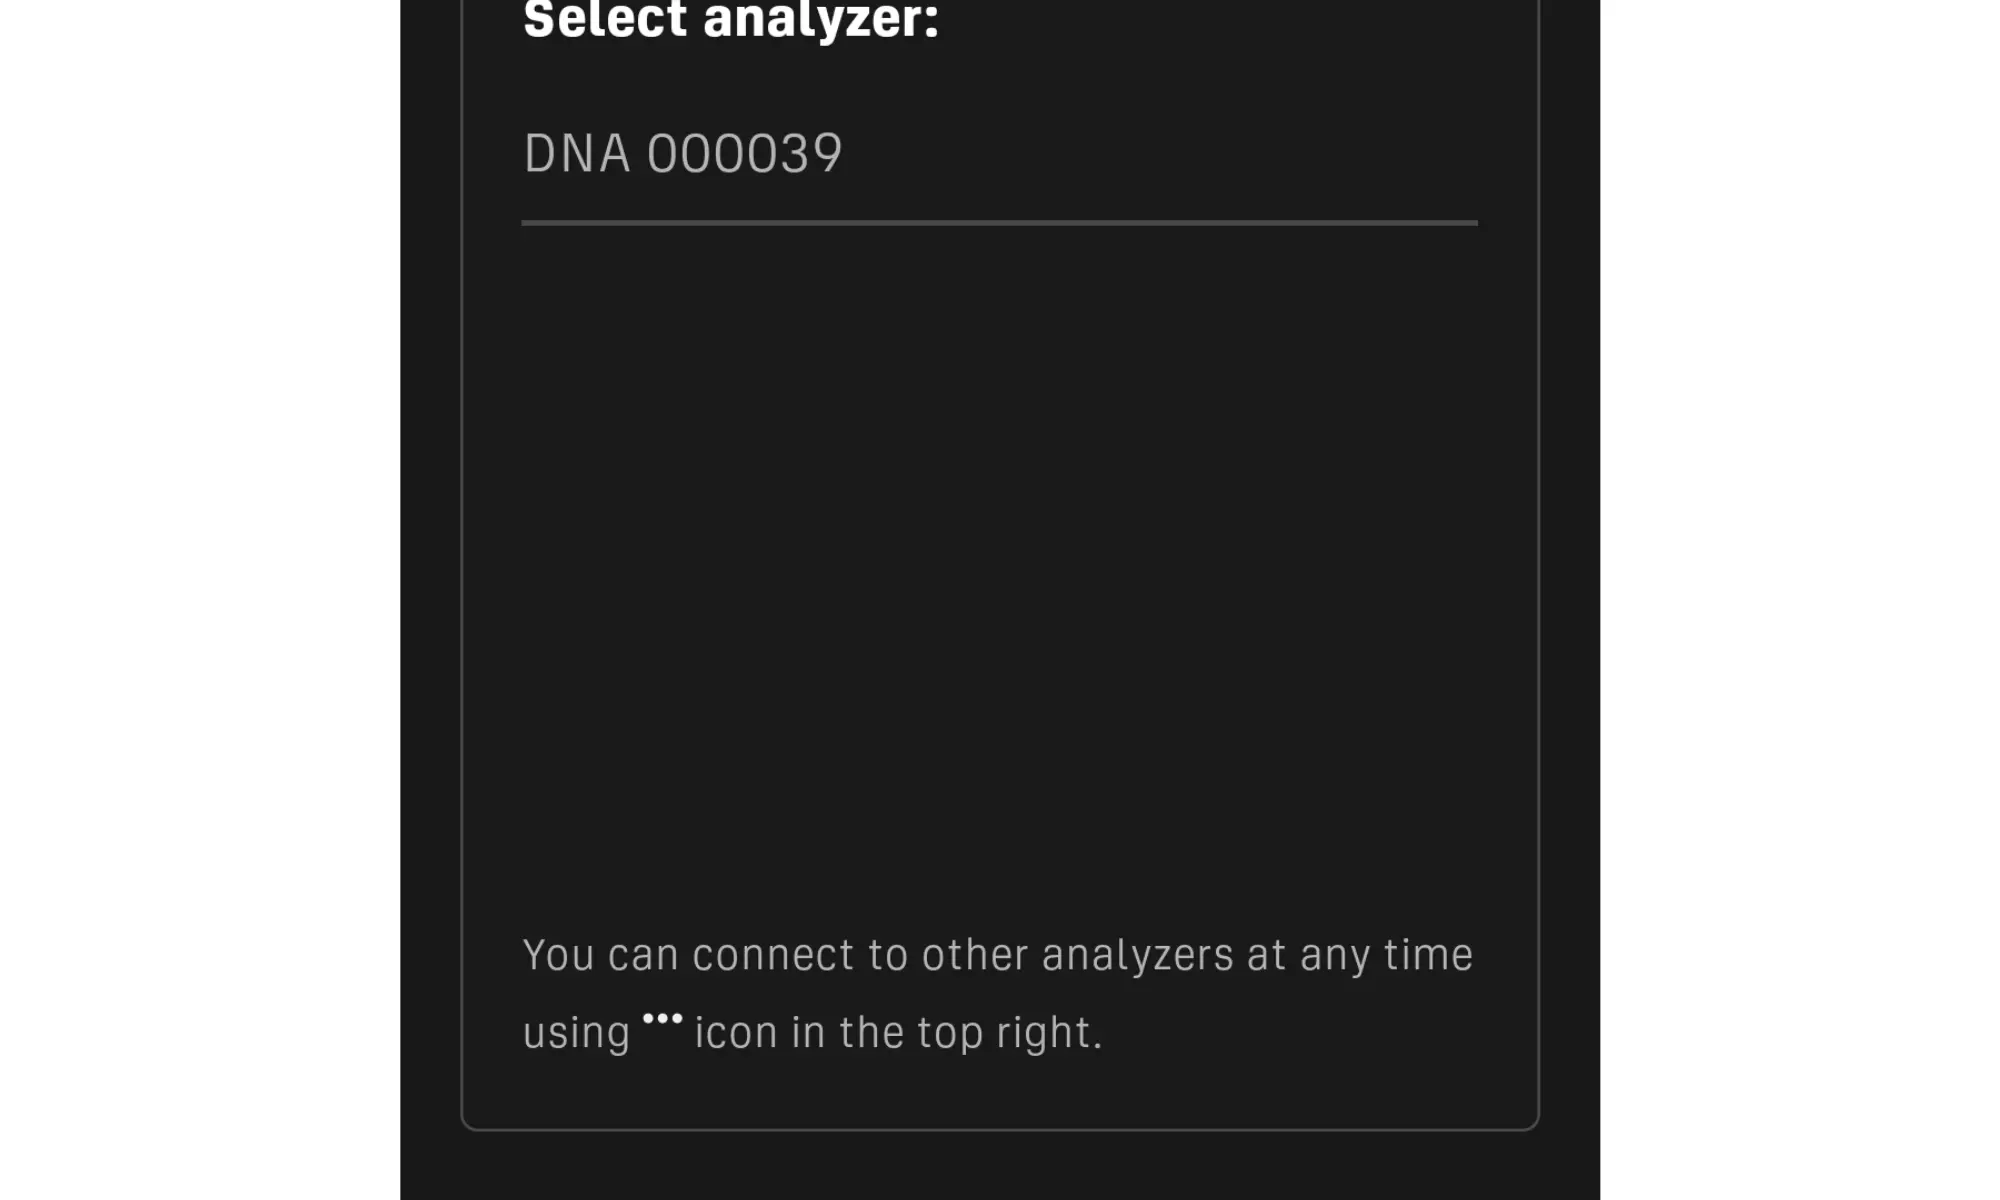
- Launch the app on your mobile phone.
- Select the ANALYZER tile on the home screen.
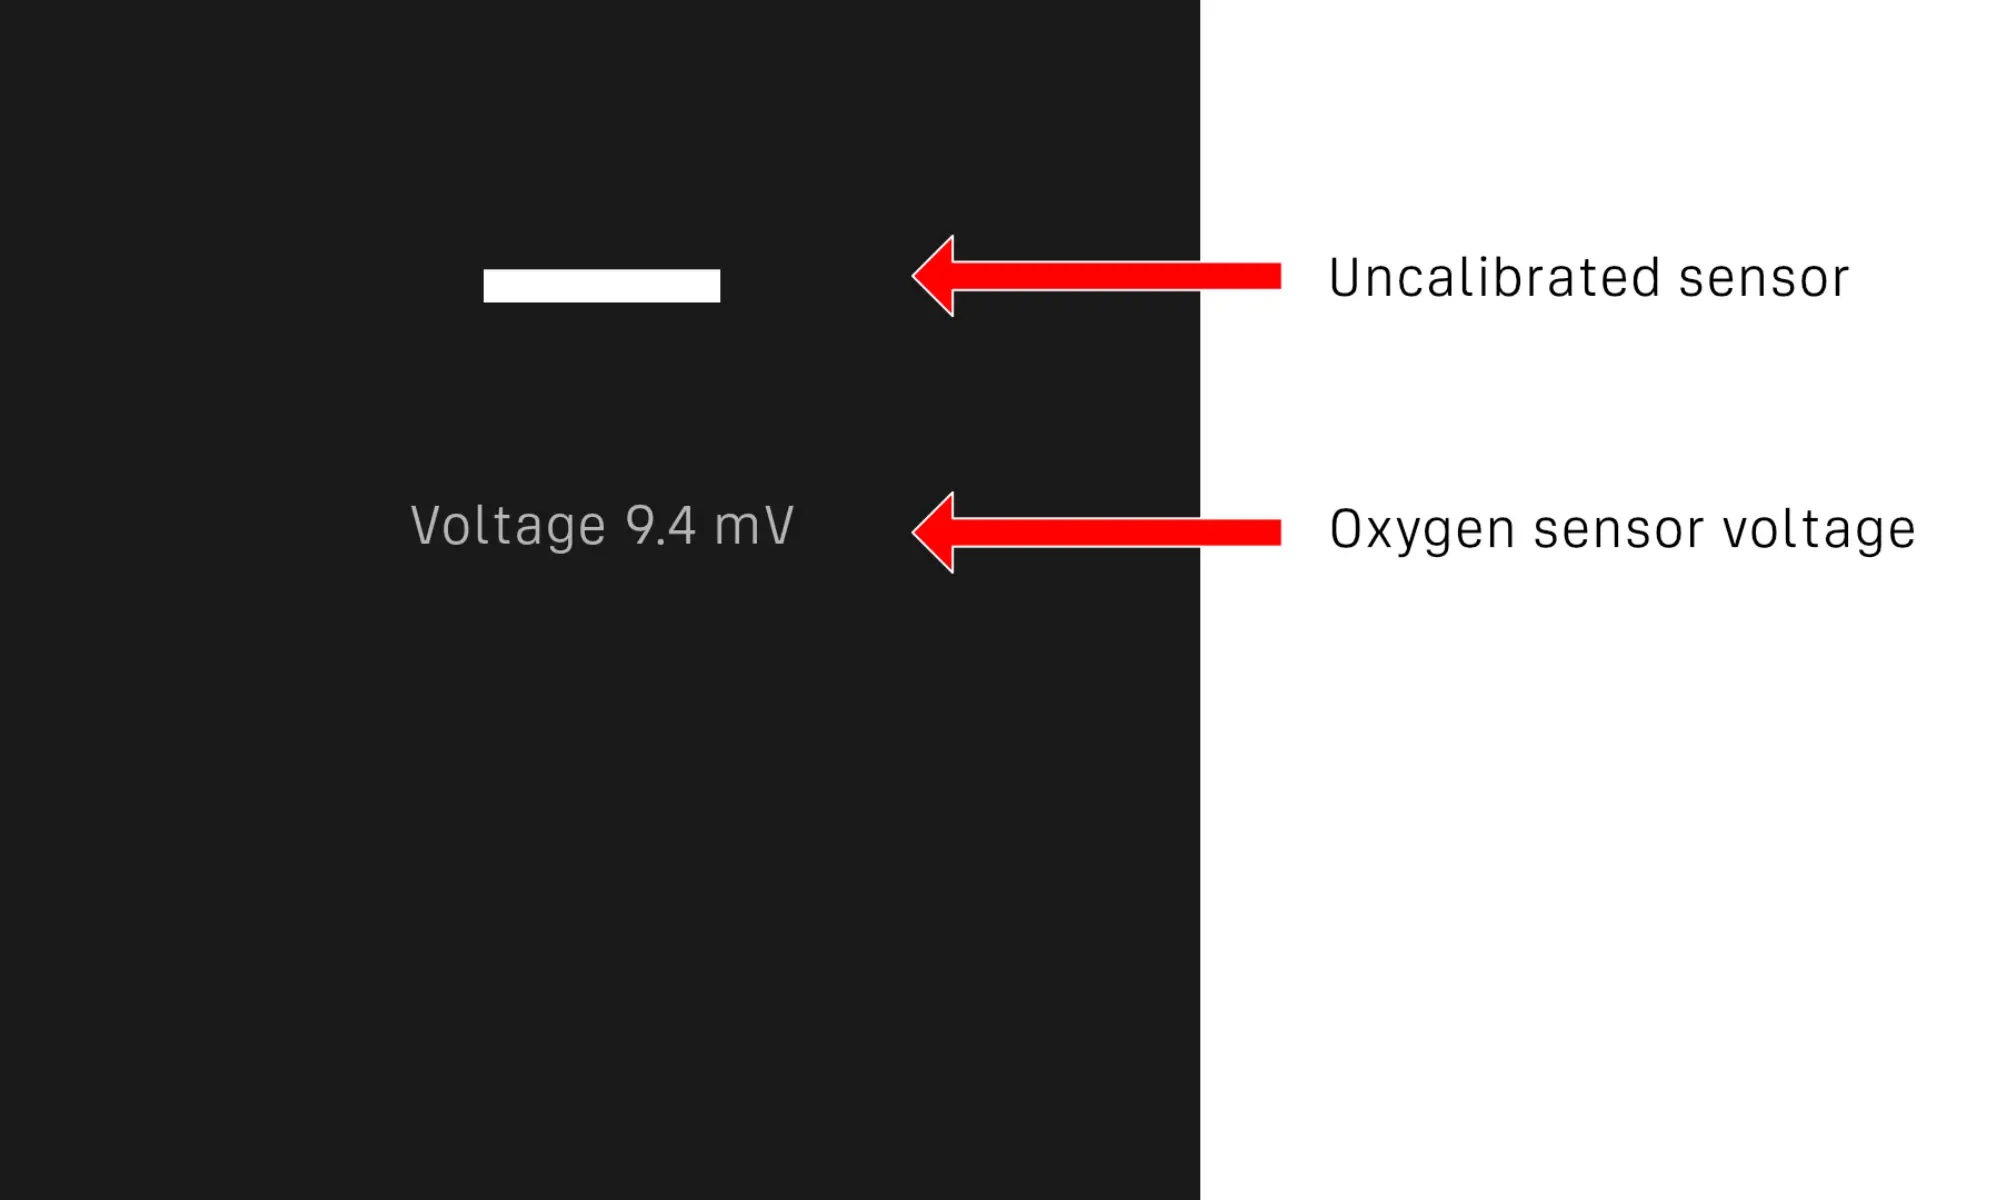
- The app will give you available analyzers nearby. The serial numbers of the DNA analyzers are displayed. The serial number can be found on the body of the analyzer under the ring.
- The app will show you a measurement screen with the uncalibrated sensor and the sensor voltage value.
Note - the next time you run the app, if the paired DNA analyzer is in range, the app will display the analyzer measurement directly.
2.4 Calibration
Calibration is required before each new use of the analyzer. Calibration can be to ambient air or to oxygen.
In the case of calibration to air, it must be ensured that the gas in contact with the sensor is guaranteed to be air. If there is a risk that the sensor has been purged with a gas other than air, draw air from the inlet hole of the analyzer for about 10 seconds.
If calibrating on oxygen, a guaranteed source of pure oxygen is required. For oxygen calibration, we recommend the use of a professional DIVESOFT flow limiter with tubing for accurate and efficient calibration.
- Select the calibration option using the button at the bottom of the app screen.
- Select the calibration method AIR or OXYGEN.
- Allow the calibration gas to flow into the analyzer and wait for the sensor voltage to stabilize.
- Press CONFIRM.
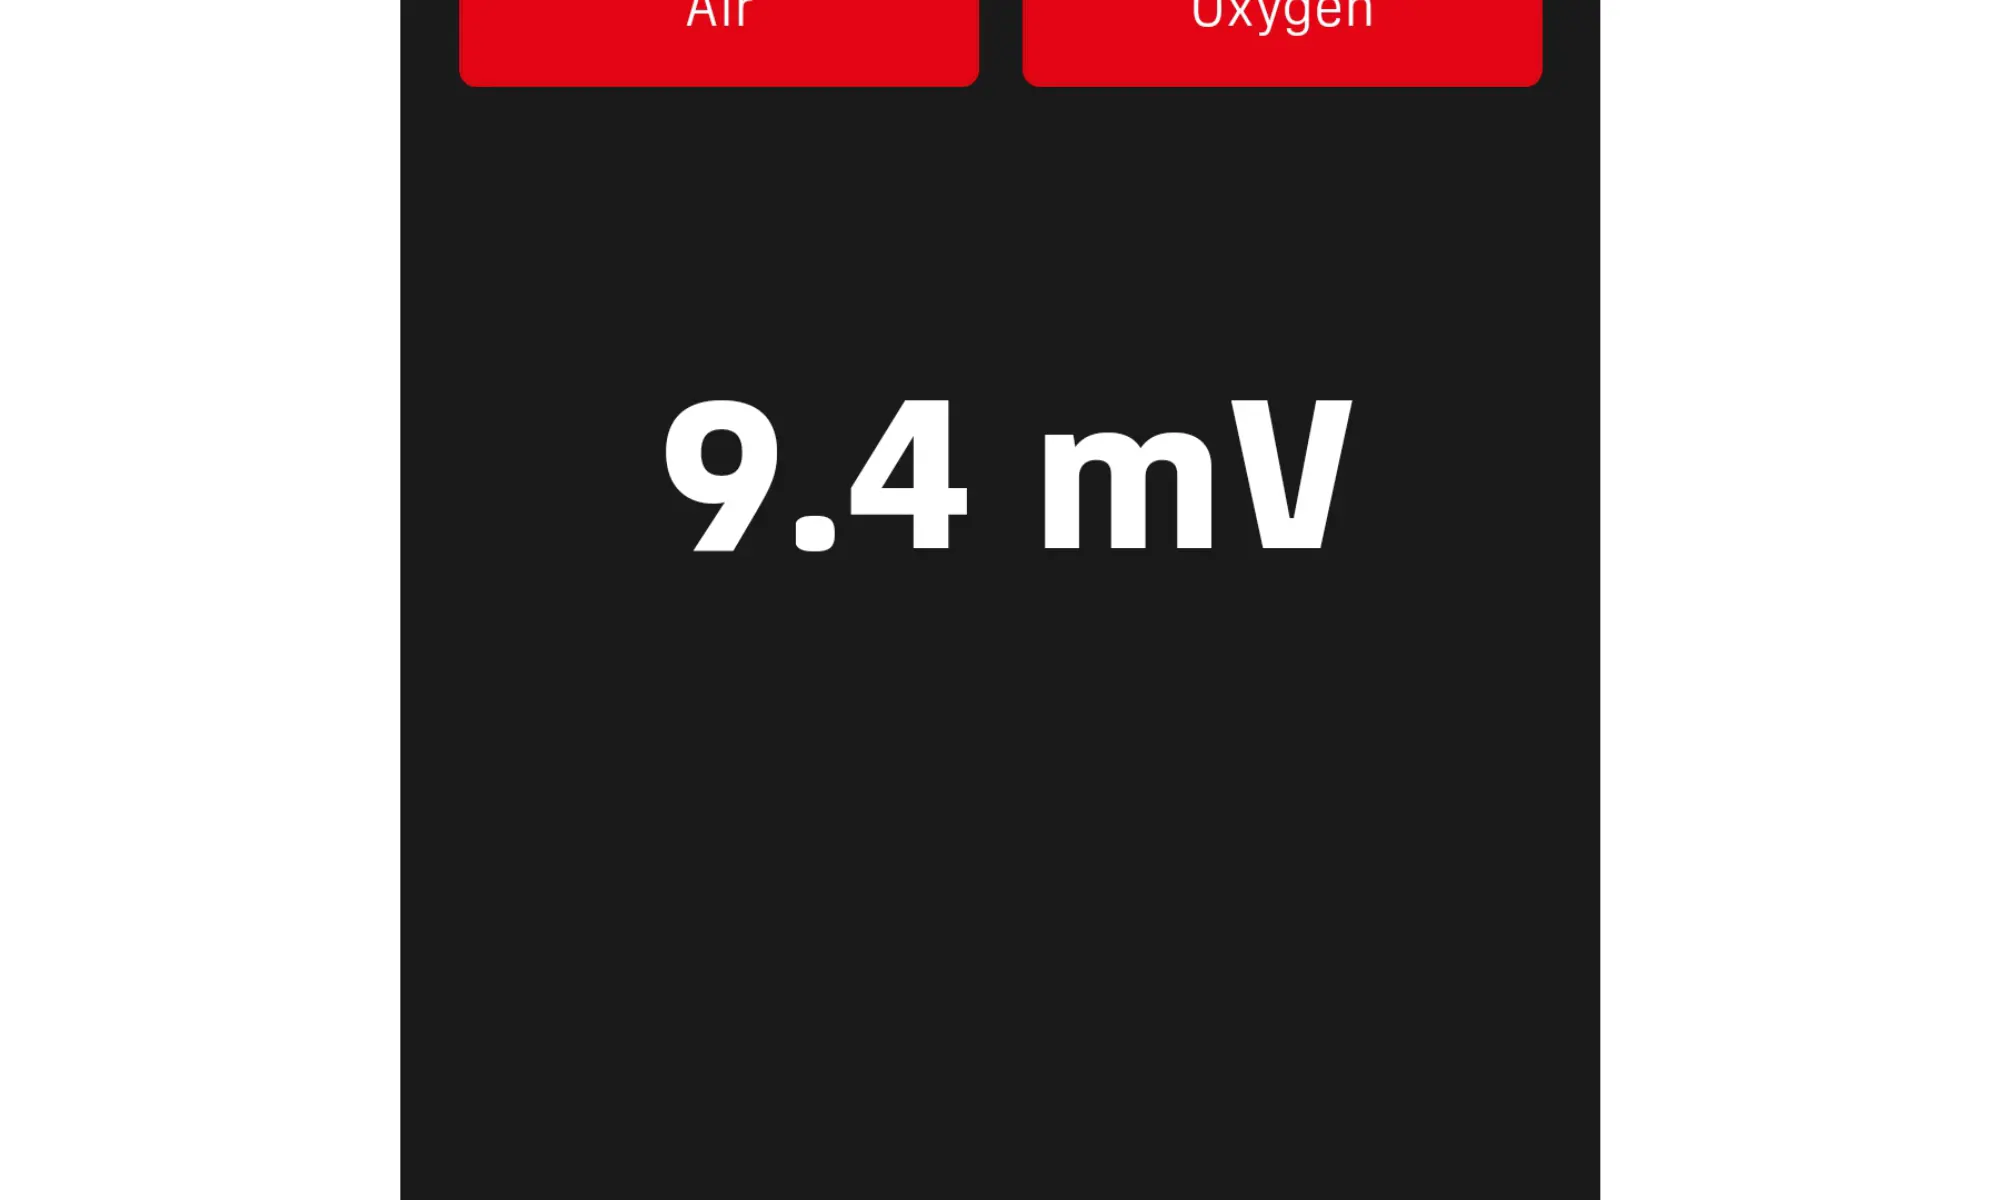
NOTE: Ensure that the sensor voltage value is within the sensor manufacturer's parameters when exposed to the gas. DIVESOFT oxygen sensors have an air voltage range of 7 - 13 mV. It is advisable to verify that the sensor shows linear measurement values When calibrating on oxygen. This can be done by multiplying the air voltage value by 4.76. The result should correspond to the voltage value on oxygen.
2.5 Analyzing
Start the application and wait for the DNA analyzer to pair - display the mixture value and the oxygen sensor voltage.
Open the valve of the cylinder containing the gas to be analyzed so that only a very gentle stream of gas escapes from the valve.
Place the front of the analyzer against the bottle valve and press firmly so that all the analyzed gas flows through the analyzer and no gas leaks past.
Monitor the value in the mobile app. The steady state value can be considered as the measurement result.
NOTE: For a more accurate and efficient measurement with minimal loss of measured gas, use the DIVESOFT professional limiter. The flow limiter tubing fits into the inlet hole in the front of the restrictor.

3. MAINTENANCE
3.1 Battery Replacement
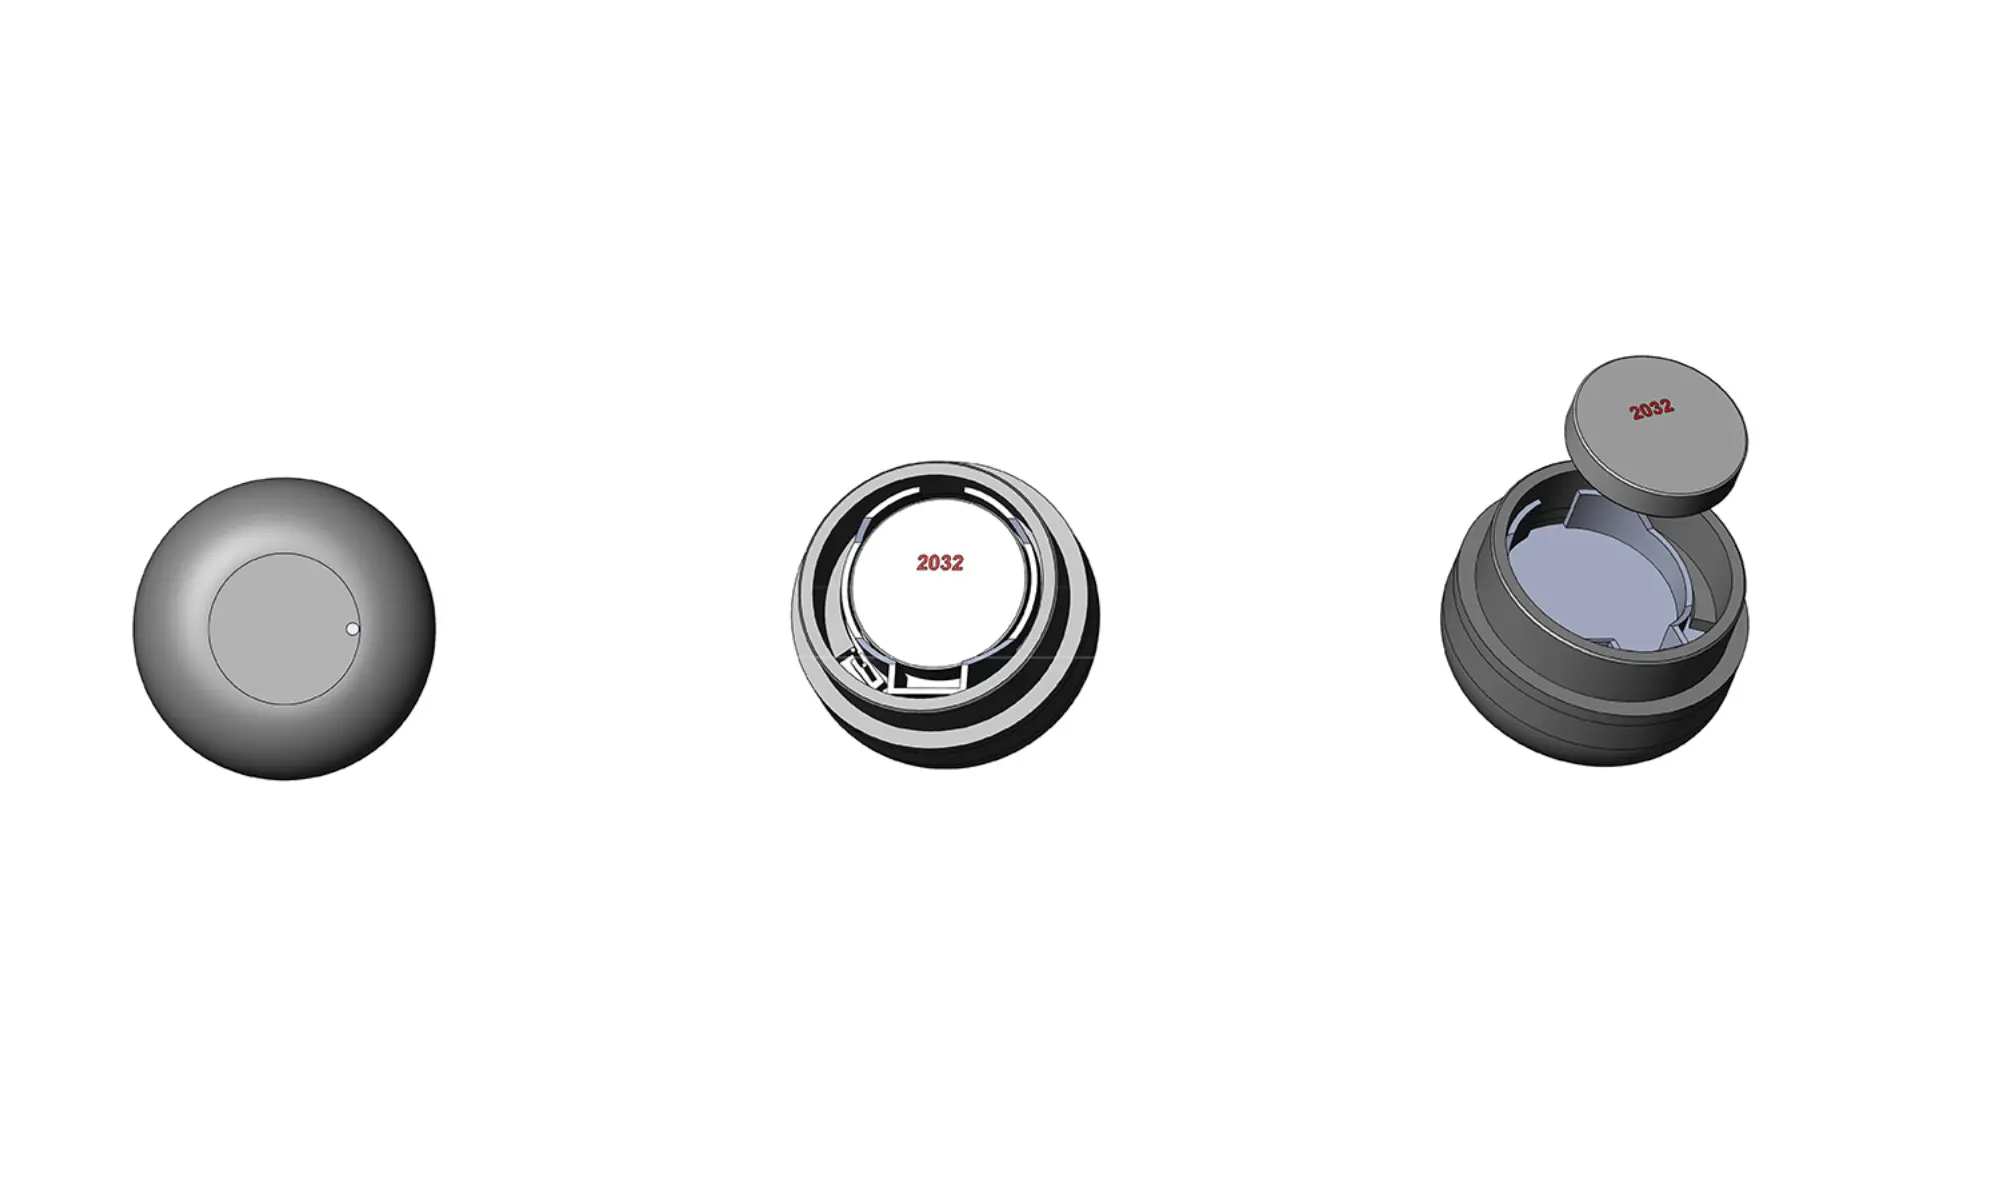
The DNA analyzer uses commercially available CR 2450 button cell batteries.
The battery life in the analyzer is 1 - 2 years. The battery status is displayed on the application screen when the analyzer is connected. Replace the battery if the battery capacity is low or the application cannot find the analyzer at all.
- Pull the bottom of the analyzer out.
- Remove the battery - use your fingernail or a flat tool to flip the metal lever to the side and remove the battery.
- Insert the new battery with the narrower side down.
The LED will flash 8 times green if the battery has sufficient capacity. If the battery capacity is low, the LED will flash 8 times in red.
The battery is included in the package.
The battery is not covered by the warranty.
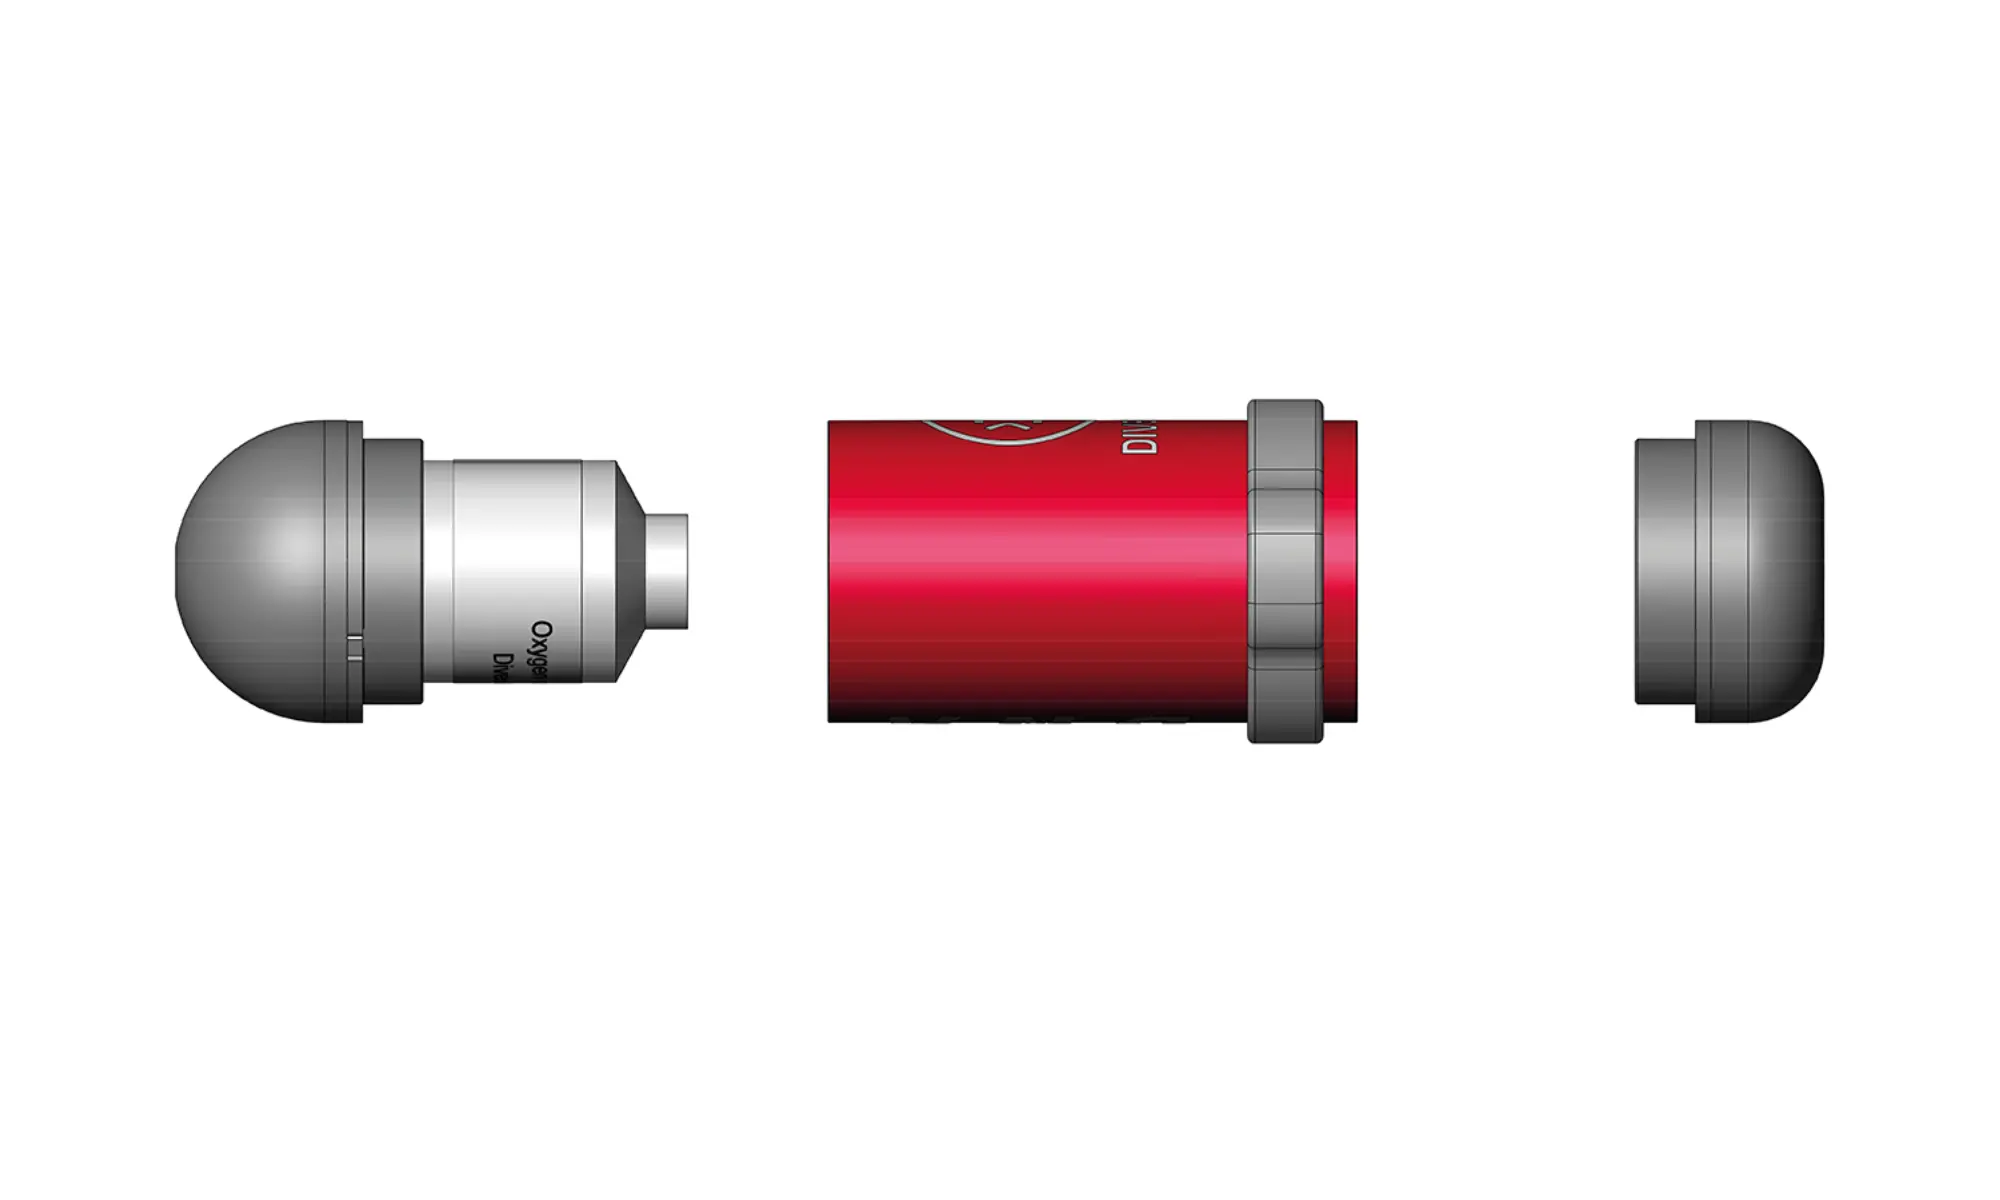
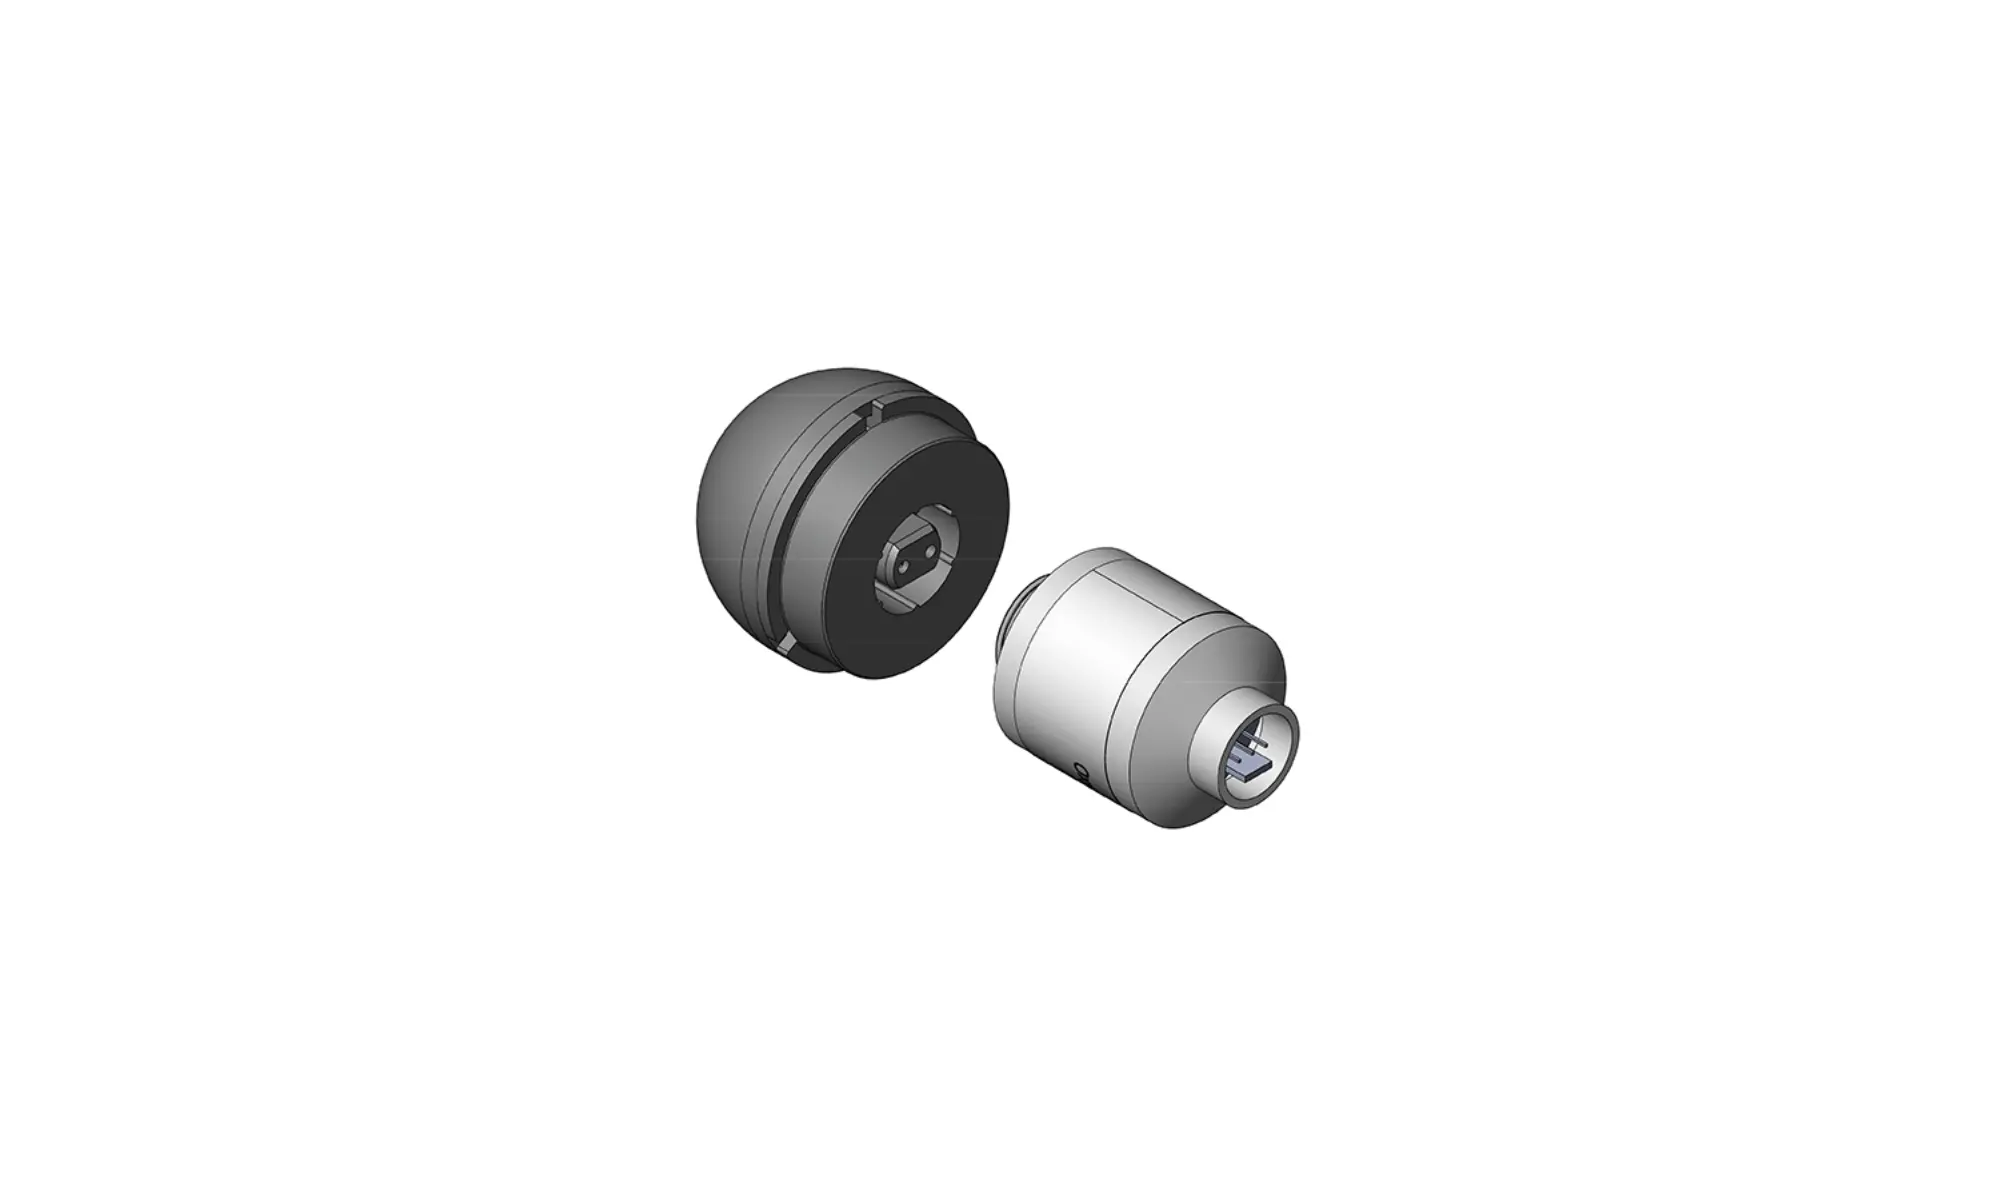
3.2 Changing the sensor
R22 sensors with molex connector are used in the device. For the analysis of NITROX mixtures, sensors discarded after 1 year of use in rebreathers can be used. The sensor should not be more than 2 years old overall at the time of use in the analyzer and should produce a voltage within the range specified by the manufacturer.
- Pull out the front of the analyzer (Do not use brute force or violent movement to avoid damage to the cables).
- Remove the molex connector. To remove the molex connector, use a fingernail or flat tool to pry the white lever inside the sensor and gently pull on the connector cables.
- Unscrew the sensor from the analyzer.
- Screw the new sensor into the front of the analyzer.
- Connect the molex connector. CAUTION: The polarity of the sensor must be observed!
- Pressurize the front of the analyzer into the analyzer body.
The sensor is not included in the basic package.
3.3 Firmware update
WARNING: Firmware updates are at your own risk. DIVESOFT is not liable for user misconduct that may cause the product to malfunction. If you are not sure whether you can handle the update, send the DNA analyzer to a DIVESOFT service technician.
WARNING: Do not perform a firmware update with a low battery. Check battery status before updating firmware.
When a new firmware is available, you will be prompted in the App / Analyzer, a new button “FW update available” will appear.
Since the DNA is built around the Nordic nRF microcontroller, the firmware is updated through the 3rd party App from Nordic called “nRF Device Firmware Update”.
Read this instructions thoroughly before starting the update, once you switch the DNA into the DFU mode, you will lose access to the “update screen” with instructions. You can always find the update instructions in the user manual (App / Manuals / Analyzer DNA).
The update itself consists of three steps, which you will find in the “FW update available” screen.
- Study thoroughly the instructions in (this) manual.
- Download the firmware itself, which is under the step #2 – a link to the firmware in a *.ZIP format. Do NOT unpack the archive, leave it as is.
- Lastly, you will need a 3rd party App for the update itself “nRF Device Firmware Update”, you will find the link on the update screen, in step #3.
The update process
- Continue only if you have completed the preparation steps.
- "nRF Device Firmware Update" installed
- Firmware archive downloaded
- Pull out the bottom of the analyzer so you can see the LED next to the battery.
- Enter the DFU mode - press and hold the button in the hole on the bottom the analyzer for 6 sec, until the LED starts flashing red and green.
- To press the button, use, for example, a SIM card removal tool or a paper clip.
- During the DFU mode, the DivesoftApp will not be able to connect to the DNA.
- If the LED is not flashing, repeat the previous step, just hold the button a bit longer.
- Start the "nRF Device Firmware Update" App
- Choose the downloaded firmware archive, named "DNA_X_Y_Z_NNNN.zip"
- Where X_Y_Z_NNNN represents the version, eg. 2_4_1_8200
- Connect to the device named "DNA-DFU"
- Press the Upload/Start button.
- Choose the downloaded firmware archive, named "DNA_X_Y_Z_NNNN.zip"
- After the new firmware is loaded, the DNA will start automatically.
NOTE: Should an error occur during upload, the device will remain in the DFU mode and the action can be repeated. In case of inactivity for 2 minutes, the DNA will switch back to standard mode.
3.4 Used sensors and batteries
Treat used oxygen sensors as hazardous waste. Use collection points or containers designed for the collection of used batteries.
Dispose of used batteries in designated collection containers or take them to a collection point.
ANALYZER DNA - USER MANUAL
Date of issue: 11 November 2023
HW 1.0, FW 2.4.0
Authors: Jakub Šimánek
Published by Divesoft s. r. o.